Tuesday, February 10, 2009
New Site for Developing Picture Cards and Icons
Mrs. Riley's Page Builder is an interactive website that is designed to make the task of creating picture cards and icons easier. According to its creators,developer Ben Throop and Autism Specialist Kristin McCole, it was, "created so professionals, teachers, and parents could collaboratively make educational materials, starting with picture cards." The duo, with a team of collaborators, set out to make a web-based program that was easier,faster and less expensive than some of the other applications used for this purpose.
As users create cards and "decks" of cards, they are either saved for personal use only or to share. The database will grow as it is utilized. Users may flag images that they deem inappropriate.
I played with the site for a while and that it was, as promised,easy to use. The searchable database already has many photographs and drawings on various topics, including morning routines, hygiene, behavior and vocabulary cards. Simply grab a template for from for to twenty cards per page and then search, drag, drop icons. Click on the tab for "decks" and drag whole sets of cards into the template at one time. Double-clicking on a card allows the user to edit the label and other features of the card.
Current weaknesses: Many of the drawings are whimsical, but are clear and easy to comprehend. I found more drawings of female subjects than male subjects, and fewer icons that looked like young children than icons depicting older individuals. I found it difficult to drop two decks of cards onto a single page,as there was no way to control which boxes the pictures fill. Some cards from the first deck, for example, were overwritten when the second deck was dropped onto the template.
For now, the public beta version of Page Builder is free. Simply register and get started immediately. Following the beta testing period, the authors promise that membership will be "very affordable." If you try it, be sure to take the pricing survey by clicking on the tag on the home page.
All in all, this looks like a promising site for easy card and icon creation. It is easier to use than Boardmaker and much easier to customize and import special images.It should be particularly helpful to the classroom teacher, daycare provider and parents, who may not have access to programs such as Boardmaker.
Friday, October 31, 2008
Picture Resources
Several participants from the summer TEACCH training have asked for assistance in finding pictures for use with their students. What are some options for using pictures for schedules and worksystems?
Boardmaker by Mayer-Johnson, www.mayer-johnson.com, is used in most settings and is convenient and versatile. At the same time, not every school has easy access to it, and not every student will be best matched to their picture-symbol format. There are a range of alternatives, both free and for purchase, that might also be considered when looking to develop visual materials. What is most important is finding a good match, and having access to materials quickly and efficiently so that visuals can be up and running to support students who need them. When making supports is efficient and easily-done, it is much more likely that the materials will be adapted to best fit student need, and that they will be dynamic and changing as the child learns and grows.
A beginning place for young children is the use of objects that can represent various activities. Some examples are using toy keys or a toy car to indicate time to go out for a ride/ errand; a spoon or small cup to represent mealtime; a block or small book to represent teaching time. Many programs have these materials already--all that is needed is a matching pair to set up a starter schedule.
Photographs are another quick resource for visual supports. There are good options on both Mac and Windows platforms to print pictures in a variety of sizes, to best suit the visual needs of the child. Just be sure to save the photos in a file as often the visuals get lost and extra copies come in handy.
Another sources for real objects is google images. It is easy to find anything from a movie cover for Finding Nemo to a photo of an oreo snack pack. Once you have assembled your images onto a word-processing or photo-editing program, be sure to save them to avoid having to re-locate them in the future.
http://www.usevisualstrategies.com/pictures.html has a number of pictures that are suitable for older students and adults. There are a number of free pictures as well as picture sequences.
Dkimages.com is a commercial photo site. Readers might be famiiar with their images in many children's books about objects in our world. In response to an inquiry, DK images allowed this user to print their low-resolution images free of charge as they were being used for individual students and not for commercial purposes. People who like their images might consider contacting the company to inform them of the intended purpose. Keep in mind this site produces images for a wide range of commercial applications so there are some unusual as well as ordinary entries, but all are beautifully clear and crisp.
Another resource that has a number of free pictures, as well as options available for purchase, is Do2Learn.com. Under their "Free Area" are a number of pictures and schedules that can be printed off. These are black-and-white clear line drawings and can be obtained with or without text. These drawings are appealing and clear.
Classroomclipart.com is a free source (requires a registration) that includes topics including animals, foods, sports, healthcare,and many other topics. These are largely photographs as well as some more stylized cartoons and may be more useful for making materials than for visual supports. The healthcare ones in particular may be helpful for medical appointments and actions (e.g., in creating a visual of the steps that will happen in a medical appointment and when it will end).
The Internet Picture Dictionary at http://pdictionary.com/ is an indexed source for simple colored drawings of various common items.
There is a nice sheet of free samples on the Pyramid Educational Products page that has great pictures of several common recreation/ leisure items and worth a look at http://www.pyramidproducts.com/PicsforPECS2008Sample.pdf.
And don't forget the easy resource for any computer with Microsoft word and a connection to the internet: http://office.microsoft.com/en-us/clipart/default.aspx. There are a range of adequate-to-good images that might fill the need.
Do be aware of copyright and fair-use laws and use the materials only for single students and never for resale. I am sure that these are only a few of the many options out there. Any feedback or other resources would be very welcomed and added to this post.
Wednesday, August 27, 2008
Structured Tasks from Vermont TEACCH 2008, Newport
North Country Supervisory Union (formerly OENSU) was host to a TEACCH course that trained 30 Vermont Educators in TEACCH Structured Teaching Level I. The training was a huge success and the ratings were high (will be posted as soon as the NC team returns from Japan). The creativity and ingenuity of the trainers and the participants is evident in the collection of structured tasks that were used with the five student co-trainers.
The following slide show showcases many of these and will hopefully inspire many more.
BubbleShare: Share photos - Create and Share Crafts
The following slide show showcases many of these and will hopefully inspire many more.
BubbleShare: Share photos - Create and Share Crafts
Monday, August 6, 2007
Starting Right with Physical Structure
With the new school year just around the corner, teachers are starting to plan for the coming year's group of students. For children with autism, a good first place to begin is to review the physical structure of the classroom and other instructional places. Physical structure refers to the arrangement of furniture, storage, decor, and instructional materials. Well-designed instructional spaces support organization, attention, and learning. Planning needs to consider the individual needs of each student as well as the collective spaces all students will be using. Be flexible with plans and prepared to make adjustments as students start to use the different spaces and areas. The following ideas have been taken from TEACCH training programs:
1. Create specific areas in the room to address different learning activities such as 1:1 instruction, recreation, group activities, and transition areas. When these are clearly defined, students can begin to associate the areas with specific activities.
2. Arrange the classroom so students can be easily supervised at all times. Use low bookcases, 3-sided carrel areas, counters for assembly jobs, and side-by-side desk areas to make viewing easier.
3. Place furniture and materials so that boundaries between areas are clear. Students can more easily know where they need to be when they can see the physical borders. Consider using colored tape on the floor, dividers created with portable chalkboards or bookcases, an inexpensive rug or floor runner, bright flourescent cones or hoses to define outdoor spaces.
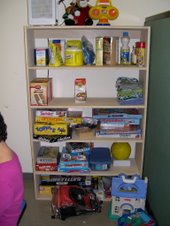
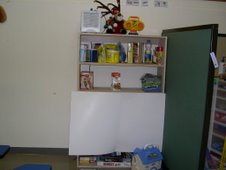
4. Set up the classroom area, furniture, and materials to minimize distractions. Clean, clutter-free areas allow students to keep their focus on instructional activities. Remove busy items such as wall displays and visually appealing mateirals such as globes, toys, gadgets and decorative items, computer monitors. Place them in areas which are appropriate for exploring or enjoying them, such as a leisure space. Minimize distractibility by covering shelves with cloth curtains or placing manipulative items in labeled plastic tubs. Secure materials in binders, folders, file drawers, and other containers. Move staff work areas away from student learning areas so surfaces are clean and clear.
5. Arrange learning spaces, aisles, and transition areas to foster independence and easy access to tools such as communication systems and schedules. Consider where students might crowd when putting away items at the start of the day and provide separation so there is room for each student. Make sure there are easy paths to move between work areas for more independent students, and some natural barriers to minimize wandering for younger or less able students. Place schedules in logical places that can be easily reached between different learning activities. Consider that your students will be learning to move with increasing independence throughout their learning spaces, and begin to plan accordingly.
6. Carry over planning to other learning spaces, such as the library, art room, and physical education area.
Subscribe to:
Posts (Atom)